- A good internet connection is required for this App to work correctly. You need at least a 3G internet connection. If that is not available it's recommended to use a WIFI connection at the location. A dedicated internet connection is recommended to prevent performance issues because of use of the connection by your guests.
- Always make sure the internet connection is working by testing it before the start of the event at the venue.
- To have the best scanning performance make sure there is enough light at the location where the tickets will be scanned.
- Do not hold your phone to close to the bar code when using the "Flash Light" on your phone
- Always have a phone charger near by to recharge your phone if necessary.
- We recommend to always print out the "Expected visitors list" as a backup procedure in case there is some kind of internet or power failure during the event and scanning is not possible.
Offline scanning
It is possible to scan offline with the Entrance App. The App automatically makes a backup of the event you have selected when you are connected to the internet. Behind the event you will see a “cloud sync icon” when offline scanning is available. In situations where you have a poor performing internet connection at the scanning location you can download the timetable tickets in advance. You can then scan the tickets at the entrance without an internet connection.
If a ticket has been bought after the time you made the ticket backup you will automatically get a warning that you need to connect to the internet to be able to check that ticket. No settings are required for this functionality. Only make sure you select and download the event tickets in advance
Tickets that have been downloaded by the App can only be accessed by the person who logged into the App when pre-loading the data. So you have to login with the same account to be able to access the ticket data when scanning in offline mode.
The application will automatically use the offline available data if it cannot reach the server within 2 seconds so you can keep on scanning tickets even if there are issues with your internet connection.
Offline scanning mode can also be enabled in the settings so the App will always use the offline available data so you do not have to wait 2 seconds if there are issues with your internet connection.
Dizizid Entrance Management in action
Login
Before the APP can be used for entrance management you need to login and set the event for which you want to do the entrance management.
| Login with your personal credentials. These are the credentials of your Dizizid account.
Search for the event you want to scan tickets for. Type the name or part of the name and search. You can also set a time period to search in. All events in that period will be displayed when specifying a From and Till date. |
| Click on the event you want to manage. (By default the current date/time is pre-filled. By pressing the clear button you can remove the default values.) If you do not see timetable results always clear the start date or change it to an earlier date |
Passcode
If you use the App allot you can set a Passcode in the App so you do login quick into the App.
A Passcode consists of 6 numbers e.g. 123456. A Passcode is also handy if other people need to use your phone and need to login quickly.
| In the settings option of the App you can login with your normal password and create a PIN code (6 numbers).
After you have created the PIN code you can set the ”Always login with passcode option”. | Next time when you have to login to the App you will see a passcode login screen. Just enter your passcode and you are in.
If you forgot your passcode press the “Cancel” button and you can login with your Dizizid account credentials. |
Wristband | Token registration
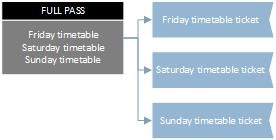
This option is only useful if you have used multiple timetables for your tickets. If you only have one timetable for all your tickets this option is not useful. But if you have for instance a Full Pass ticket with a Friday, Saturday and Sunday timetable this option can be handy. When you have a Full pass with lets say these three timetables the Full pass ticket can be scanned on Friday, Saturday and Sunday. The Full Pass ticket is a combination of multiple tickets for each timetable:
If you are using access tokens like wristbands you want all timetable tickets to be scanned at once so the ticket cannot be used on Saturday or Sunday if you have scanned it on Friday. With the wristband token registration option is this possible. When you have activated this option in the settings of the app all timetables linked to the ticket will be scanned at once. A token registration will also be done, so you can see that a token/wristband has been issued.
| In the settings option of the App you can use the "Register access tokens" option.
| With the register access token option, you can scan the ticket and just press ok. The ticket for that day will be scanned and registered. If you choose the "Register token" option a token registration will be done.
|
| After registration of the token you will see a confirmation of this token registration. If the ticket is scanned again you will be able to see this message again so you know a token has been issued. |
Manual search
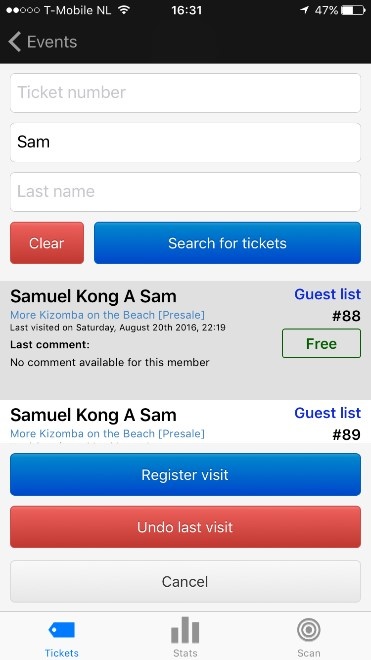
You can search for a ticket by entering the ticket number, first or last name of the person. Below the name you see the offer (type of ticket) that has been bought. |
| Click on the person to register the entrance visit. If a person has multiple tickets you will see the name several times with a different ticket id.
Every ticket should be registered separately. |
Payment registrations for reservations
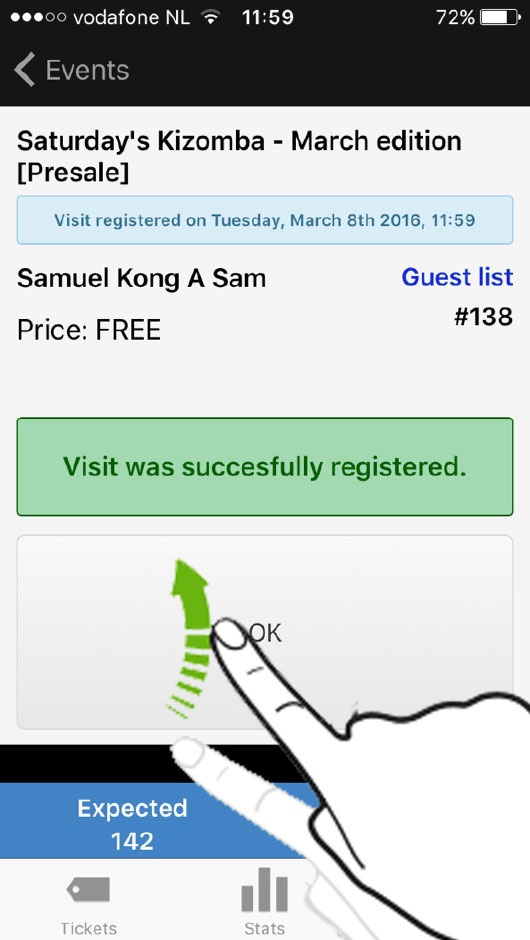
If a ticket has been registered successfully you will receive a notification of the visit registration. | If the ticket is a “Reservation” and has not been paid yet you will get an option to register a payment. |
| A down payment or final payment can be registered by entering the amount. |
| After the payment has been registered successfully you will receive a confirmation of the payment registration. |
Scanning
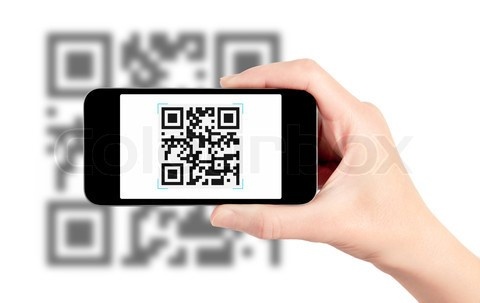
On the scan tab you can scan the bar codes on the tickets. Adjust the phone so the barcode can be read. Move the phone towards or from the barcode so the camera can focus on the barcode. | First you will see a green, orange or red screen for 0.5 second when the ticket is found. Green means the ticket is OK. Orange means the Ticket is a Reservation ticket and has to be paid for. Red means the ticket cannot be found or is not valid. |
You will then see the ticket information screen with details about the ticket. | If the ticket is OK and paid for, just press OK. You can also make a down- up SWIPE movement. |
Scanning invalid tickets
When you start scanning you need to set the timetable for which you want to do the scanning. If you have multiple timetables: for instance for a Friday, Saturday and Sunday party and you will be scanning for the Friday party you will select the Friday timetable and retrieve all tickets with access to the Friday party.
It happens that people show up with a ticket that is not valid for the timetable you have set for scanning. For instance they show up with a ticket for the Saturday party, or they show up with a Hotel package ticket. As long as these tickets are part of the same total event you can still scan these tickets.
So if you have an Event with timetables for Parties, Workshops, Socials, Hotels all these ticket can be scanned without changing the timetable.
| When you scan such a ticket that is not part of the timetable you set for scanning a warning will be displayed.
You can decide to accept the ticket or not. |
Member ticket comments
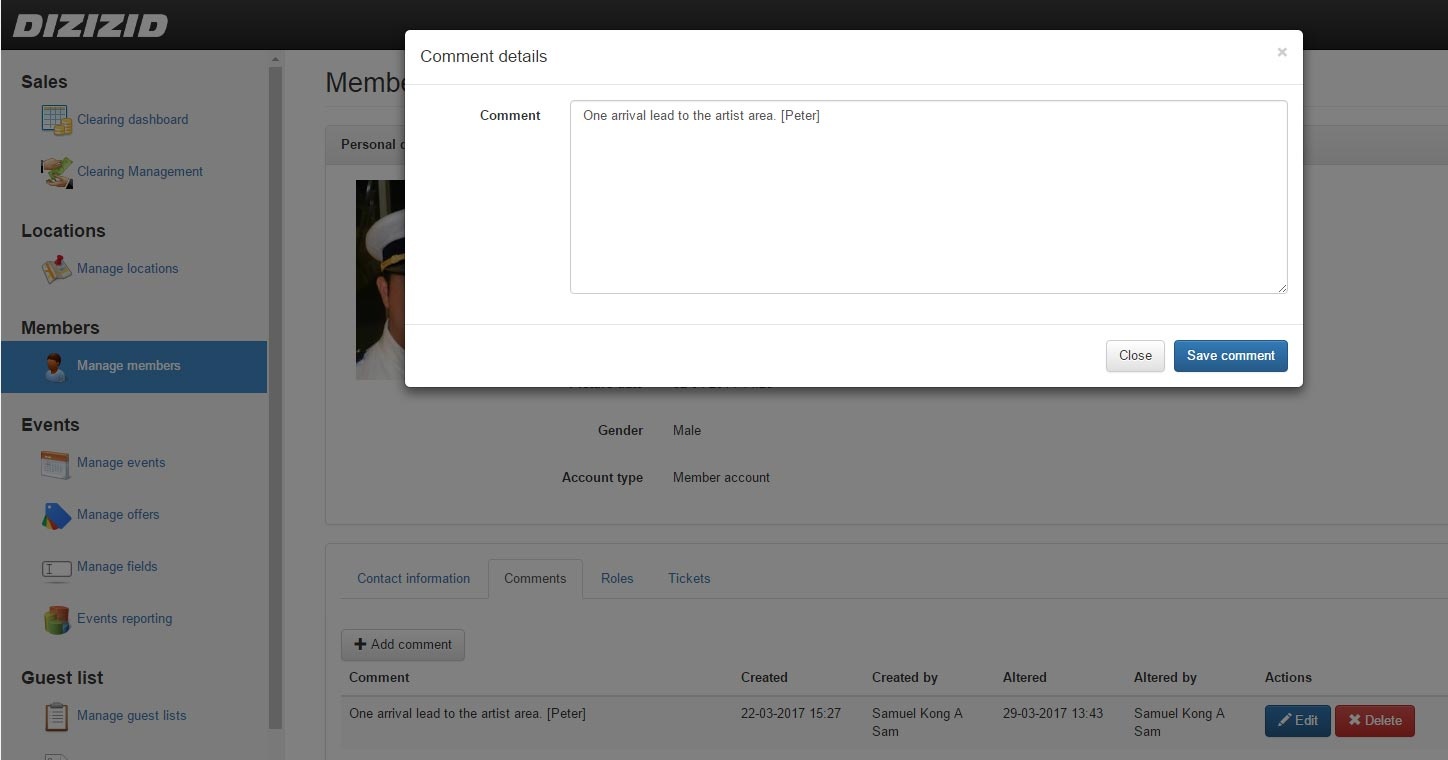
If you have important information that the person scanning the ticket needs to know you can put a comment for that specific ticket member in the Admin system. The last comment for that member will be shown when their ticket is scanned. This solution works real time. So if the scan app is online and you put this comment into the admin it will show up immediately when the persons ticket is scanned.
The last comment that you put in the Admin system for a member will be shown when their ticket is scanned. | A member comment window will appear with the comment information when the ticket is scanned. |
Undo visit registration
It happens that a ticket is scanned but for some reason the visitor cannot enter the event. They forgot something, have to wait for someone, or you made a mistake as ticket inspector and have registered the wrong person manually.
| In this situation you can search for the ticket by name. When you click on the ticket you will see the option “Undo last visit”. After the visit has been undone the ticket can be used later.
|
Reporting
| In the blue bar below you can see how many tickets are expected. For more detailed information press on the expected number.
If gender information is available this will be displayed. Tickets that do not have that information will be displayed as N/A (Not Available). |
| You can also see how many of those tickets are scanned. Press on the scanned number. |
Tickets
|
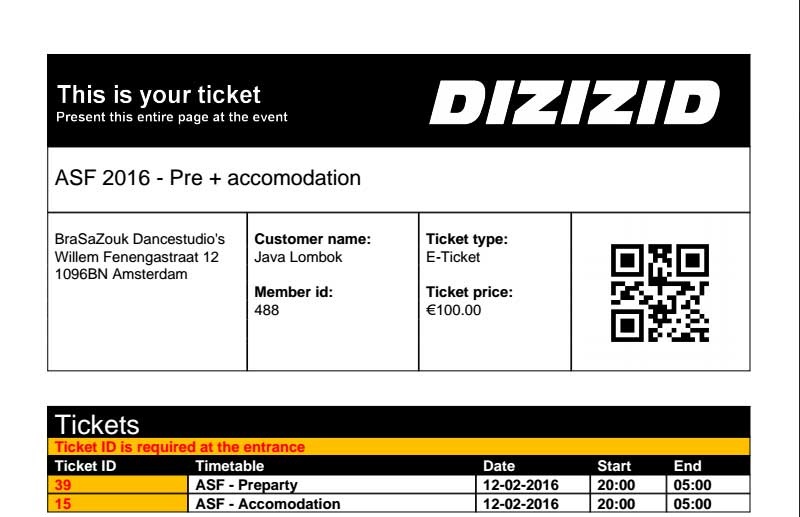
Example ticket. Ticket id in the left lower corner in red.
The same ticket can give access to multiple events. In this example this ticket can be scanned for the ASF- Preparty event, but also for the ASF-Accommodation. |
Example practice bar code
| Use this bar code to practice scanning tickets. |
Scanning tips
When you are scanning a QR code always check if the code has been printed correctly. It happens that people make a printout where parts of the QR code are missing. The App cannot recognize the QR code if it's not completely printed. In those cases just manually search for the ticket and register the ticket.
When scanning do not hold the camera too close to the QR code. Hold your phone a little further away so the camera can focus on the QR code. When scanning make sure the QR code and the camera are both horizontal. If you try to scan the QR code under an angle it will be harder for the App to read the QR code.


